Chicken and Dumplings

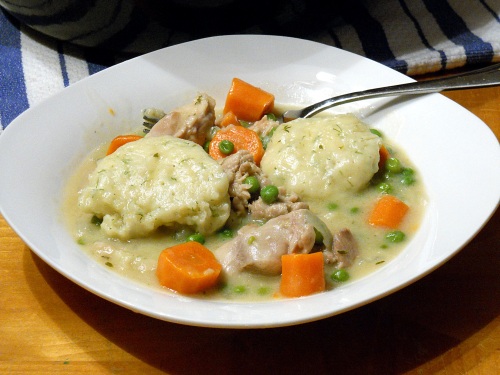
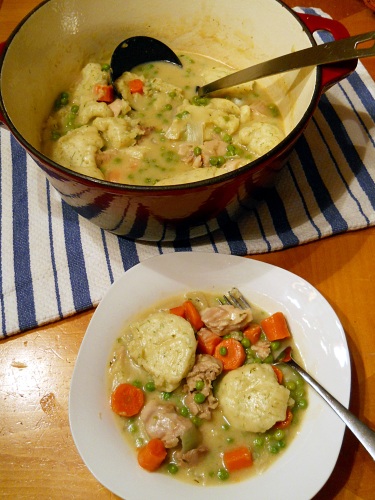
I’ve been on a sweet kick lately so it’s time for something savory. The weather has turned cold and we even had our first big snow storm of the season last week. When there is 5-6 inches of snow in your yard you want something warm and comforting. This is where chicken and dumplings comes into play. Most chicken and dumplings can be very bland and not at all impressive. I’ve found a recipe that is neither one of those. Everything is full of flavor even down to the dumplings. I was impressed how the dill dumplings complimented the chicken stew. My whole family loved this and it’s now a regular in our house.
Chicken and Dumplings:

  • 3 tablespoons butter
  • 1 medium onion, cut into 1-inch pieces
  • 5 medium carrots, cut crosswise into 1 1/2-inch pieces
  • 1/2 teaspoon dried thyme
  • 1 cup (spooned and leveled) all-purpose flour
  • 1 can (14.5 ounces) reduced-sodium chicken broth
  • Coarse salt and freshly ground pepper
  • 1 1/2 pounds boneless, skinless chicken thighs, cut into 2-inch pieces
  • 2 tablespoons chopped fresh dill, or 3/4 Teaspoon dried dill weed
  • 1 3/4 teaspoons baking powder
  • 1/2 cup plus 2 tablespoons milk
  • 1 package (10 ounces) frozen peas
  1. In a Dutch oven (or a 5-to-6-quart heavy pot with a tight-fitting lid), heat butter over medium. Add onion, carrots, and thyme. Cover and cook, stirring occasionally, until onion is soft, about 5 minutes. Add 1/4 cup flour and cook, stirring, 30 seconds. Add broth and bring to a boil, stirring constantly; season with salt and pepper. Nestle chicken in pot; reduce heat to medium-low. Cover and cook, stirring occasionally, 20 minutes.
  2. Meanwhile, make dumplings: In a medium bowl, whisk together remaining 3/4 cup flour, dill, baking powder, and 1/2 teaspoon salt. With a fork, gradually stir in 1/2 cup milk to form a moist and soft batter. It should be just a little thicker than pancake batter and should easily drop from the tip of a spoon. (Add additional 2 tablespoons milk if too thick.) Set aside.
  3. Stir peas into pot. Drop batter in simmering liquid in 10 heaping tablespoonfuls, keeping them spaced apart (dumplings will swell as they cook). Cover, and simmer until chicken is tender and dumplings are firm, 20 minutes. Serve.

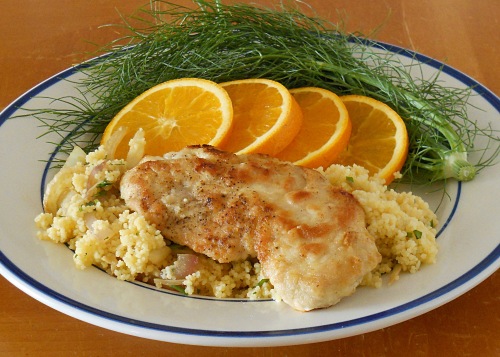
Chicken and Couscous with Fennel and Orange

I would first like to apologize for not posting in almost 2 weeks. We have had some hiccups with the house and I’ve had my main focus on those. Hopefully, we won’t be having many more hiccups and I can get back to blogging. Now, onto the food.

This dish is full of flavors. My favorite one being the fennel. I LOVE fennel! And anytime I can use it in a dish, I will. For those not familiar with it, it’s got a licorice taste. I personally don’t like the candy licorice, but fennel makes me swoon. I could go on and on about fennel, but there are other elements to the dish too. The couscous gets cooked in chicken broth and orange juice to give a wonderful flavor. The chicken gets a great browned exterior from the dredging in flour. But what’s best of all about this whole thing is that it’s all done 1 skillet! No need to dirty several pans. I am looking forward to making this recipe again. Enjoy!

Chicken and Couscous with Fennel and Orange:

  • 4 boneless, skinless chicken breasts, tenderloins removed and breasts trimmed. (I bought cutlets and used 6 cutlets)
  • 1/2 cup unbleached all-purpose flour
  • Salt and ground black pepper
  • 1/2 cup olive oil
  • 1 medium onion, sliced thin
  • 1 fennel bulb, trimmed, cored and sliced thin
  • 1 cup plain couscous
  • 3 medium garlic cloves, minced or pressed through a garlic press (about 1 tbs)
  • Cayenne Pepper
  • 1 cup orange juice
  • 3/4 cup low-sodium chicken broth
  • 1/4 cup minced fresh cilantro leaves
  1. If you are not using cutlets, pound each chicken breast between 2 sheets of plastic wrap to a uniform 1/2 inch thickness. Place the flour in a shallow dish. Pat the chicken breasts dry with paper towels and season with salt and pepper. Working with 1 chicken breast at a time, dredge in the flour, shaking off the excess.
  2. Heat 2 tbs of the oil in a 2 inch nonstick skillet over medium high heat until just smoking. Carefully lay the chicken breasts in the skillet and cook until well browned on the first side, 6-8 minutes.
  3. Flip the chicken breasts over, reduce the heat to medium, and continue to cook until the thickest part of the chicken registers 160-165 degrees on an instant-read thermometer, 6-8 minutes longer. Transfer the chicken breasts to a plate, tent loosely with foil, and let rest while cooking the vegetables and couscous.
  4. Add 1 tbs more oil to the skillet and return to medium-high heat until shimmering. Add the onion, fennel, and 1/2 tsp salt and cook until the onion is softened, 5-7 minutes. Stir in the couscous, garlic, and a pinch cayenne and cook until fragrant, about 30 seconds.. Stir in the 3/4 cup of the orange juice and broth, scraping up any browned bits. Bring to a simmer, cover, and let sit off the heat until the liquid is absorbed, about 5 minutes.
  5. Whisk the remaining 5 tbs oil, remaining 1/4 cup orange juice, 2 tbs of the cilantro, and a pinch of the cayenne together in a small bowl.
  6. Gently fold the remaining 2 tbs cilantro into the couscous with a fork and season with salt and pepper to taste.. Drizzle the oil-orange juice mixture over the chicken and couscous before serving.
Source: The Best Skillet Recipes by Cook’s Illustrated

Panko Crusted Salmon

Several years ago my Aunt Terri went to a book signing for Ina Garten. She brought me back a signed copy of “Back to Basics” from Ina. It was/is one of my most prized cookbooks. She told me all about her time with Ina. While she was getting the books signed, my Aunt was having a wonderful time chatting with her. She told her about a recipe she created and would like to share with her. She gave Ina a recipe and that recipe was this panko crusted salmon.

Flash forward to October 2010. I receive a call from Aunt Terri. She had just received her copy of Ina’s new cookbook “How Easy Is That?” and inside was a recipe for Panko Crusted Salmon! She was telling how Ina changed some things up, but it was her recipe. I had to help calm her down cause she had mixed emotions on this. She was excited but wanted some sort of recognition, so here it is!

I will be honest with you, Aunt Terri’s recipe beats Ina’s recipe, hands down! I’m not just saying that because she’s family. My aunt has created what is THE BEST crust for salmon or any other fish. My husband does not like salmon, so when I make salmon for myself and the kids, I always have another fish to prepare for him. I put this crust on tilapia and Jim LOVED it! So don’t be afraid to try this on something other than salmon. I promise you, this recipe will become your favorite fish recipe.

Panko Crusted Salmon:

  • ½ lb. butter (2 sticks)
  • ¼ cup minced garlic
  • ½ cup whole grain mustard
  • ¼ cup chopped fresh dill
  • 1 lemon, juiced
  • 1 tbs old bay seasoning
  • 1 tbs salt
  • 1 tbs cracked pepper
  • 1 ½ cup panko bread crumbs
  • 1 (3-4 lb.) side of salmon, skin on, bones removed
  1. Preheat oven to 425 degrees and line a baking sheet with foil.
  2. Whip the butter with electric mixer or stand mixer fitted with the paddle attachment, until fluffy.
  3. Add the next 7 ingredients and mix well. Mix in the panko crumbs by hand with a wooden spoon.
  4. Lay the salmon, skin side down on the baking sheet and remove excess moisture with a paper towel. Spread the panko mixture on the salmon to 1/4 inch thickness over the salmon. Bake for 30 minutes or until the fish begins to flake. *Note* if the layer of crust is thicker it will take longer to bake.
Source: Aunt Terri original

Chili Cheese Pasta Bake

My husband has started his job 2 hours away from us and once the kids are done with school we will be joining him. Till then, we get to see him on the weekends. I worry about what he would be eating during the week I’m not around. He can cook if he has to, but he’s not comfortable with it. I’ve spoiled him way too much.

So, I’ve been making dinners on the weekends with enough to give him extra for dinners throughout the week. I love finding recipes that are great make-ahead dinners. I doubled this recipe to make sure I had enough for dinner that night and for hubster to have dinner later in the week.  The kids and I really enjoyed it. It had the perfect chili flavor one would expect and the pasta and cheese made it even better. I ended up freezing the dish I set aside for my husband and sent it off with him that way. When he was finally able to get around eating it, he said he loved it. This makes a great make-ahead dinner as it froze really well and tasted even better doing it that way.

Chili Cheese Pasta Bake:

*I doubled this recipe with no issues

  • 1/2 pound elbow macaroni or any other twisty shaped pasta
  • Salt
  • 3 tablespoons vegetable oil
  • 1 1/2 pounds ground beef (85% lean)
  • 2 medium onions, chopped
  • 1 red bell pepper, stemmed, seeded and chopped
  • 6 garlic cloves, minced
  • 1 1/2 tablespoons chili powder
  • 1 tablespoon ground cumin
  • 1 (28 oz) can crushed tomatoes
  • 1 (14.5 oz) can diced tomatoes
  • 1 tablespoon light brown sugar
  • 12 oz Colby Jack cheese, shredded (about 2 1/2 cups)
  1. Preheat the oven to 400 degrees.
  2. Bring 4 quarts water to a boil in a large pot over high heat. Stir in 1 tablespoon salt and add dry macaroni; cook until al dente. Reserve 3/4 cup pasta water and drain pasta. Transfer to a large bowl and set aside.
  3. Using the same large pot, wipe dry and heat over medium heat. Add 1 tablespoon oil and heat until shimmering. Add ground beef and break it up in pieces to brown. Once browned, remove from pot and discard drippings. Set beef aside.
  4. Add remaining oil to the same large pot and return to medium heat until shimmering. Add onions, garlic, red pepper, chili powder, and cumin; cook, stirring occasionally, until vegetables are softened and begin to brown.
  5. Add the crushed tomatoes, diced tomatoes, brown sugar, reserved 3/4 cup pasta water and beef to the pot. Bring to a simmer and cook for 20 minutes, stirring occasionally until flavors have blended.
  6. Stir in the cooked pasta, 1/2 cup of shredded cheese and season with salt and pepper to taste. Transfer mixture to a 9×13 baking dish and smooth over with a spatula. Bake in the preheated oven for 30-35 minutes or until the mixture is hot and bubbling.
  7. Remove from oven and sprinkle the top of the dish with the remaining shredded cheese. Return the dish once again in the oven and bake for 5-10 minutes until the cheese begins to melt and brown. Cool for 10 minutes before serving.
Source: Joelen Blog via Cook’s Illustrated

Chicken Piccata

WOW, is all I can say about what has been going on the past couple weeks with us. For those who aren’t familiar with our situation, my husband lost his news job last year. We ended up moving back to his home state of PA, while he pursued an instructor job at Penn State University, and took a break from his journalism career. But, the draw of news was way too strong and an opportunity came to get back in the business and also be close to family. I am proud to say that he’s the new News Director for WJAC in Johnstown, PA. There are so many things that we are thankful for and looking forward to. This past year we have been with my in-laws, and getting back out on our own, well, I can’t even put it into words. I’m excited to have my own kitchen again so I can cook and bake like crazy. I hope my husband’s new staff is ready for me. They have no idea how much food they will be eating. The next couple months we are going to be house hunting, kids finishing school, and moving,  so I will do my best to post as much as I can.

Back in January, my husband got me a subscription to Cook’s Illustrated magazine. One of the bonus items I received was their All Time Best Recipes magazine. It’s filled with many great things and one of them is this Chicken Picatta. I couldn’t wait to make it so I went out and got everything I needed. It was amazing, everyone loved it, especially my son. My son seriously loves lemons and this was right up his alley. The sauce is surprising light and refreshing with the lemon, chicken broth and butter. It was a great weeknight meal, serve with rice and a nice arugula salad.


Chicken Picatta:

  • 2 large lemons
  • 8 chicken cutlets or 4 boneless, skinless chicken breasts cut in half, lengthwise
  • 1/2 cup unbleached all-purpose flour
  • 1/4 cup vegetable oil
  • 1 small shallot, minced (about 2 tbs) or 1 small garlic clove, minced or pressed through garlic press (about 1 tsp)
  • 1 cup low-sodium chicken broth
  • 2 tbs drained small capers
  • 3 tbs unsalted butter, softened
  • 2 tbs minced fresh Italian parsley leaves
  1. Adjust oven rack to lower-middle position, set large heatproof plate on rack, and heat oven to 200 degrees.
  2. Halve 1 lemon pole to pole. Trim ends from one half and cut crosswise into slices 1/8 to 1/4 inch thick; set aside. Juice remaining half and whole lemon to obtain 1/4 cup juice; reserve.
  3. Sprinkle both sides of cutlets with salt and pepper. Measure flour into pie tin or shallow baking dish. Working 1 cutlet at a time, coat with flour and shake to remove excess.
  4. Heat 2 tbs oil in heavy-bottomed 12-inch skillet over medium-high heat until shimmering. Lay half of chicken pieces in skillet. Saute cutlets, without moving them, until lightly browned on first side, 2 to 2 1/2 minutes. Turn cutlets and cook until second side is lightly browned, 2 to 2 1/2 minutes longer. Remove pan from heat and transfer cutlets to plate in oven. Add remaining 2 tbs oil to now-empty skillet and heat until shimmering. Add remaining chicken pieces and repeat.
  5. Add shallot or garlic to now-empty skillet and return skillet to medium heat. Saute until fragrant, about 30 seconds for shallot and 10 seconds for garlic. Add broth and lemon slices, increase heat to high, and scrape skillet bottom with wooden spoon or spatula to loosen browned bits. Simmer until liquid reduces to about 1/3 cup, about 4 minutes. Add lemon juice and capers and simmer until sauce reduces again to 1/3 cup, about 1 minute. Remove pan from heat and swirl in butter until butter melts and thickens sauce; swirl in parsley. Spoon sauce over chicken and serve immediately.

Source: Cook’s Illustrated All-Time Best Recipes

Creamy Chicken and Spinach Casserole

I think I might have a new goal; trying to make as many dishes I can out of the America’s Test Kitchen Healthy Family Cookbook. I have made a handful of recipes so far and they all have been really good. The biggest plus is that they are healthier for you. The newest one I tried was the Creamy Chicken and Spinach Casserole. I ended up doubling the recipe to make sure we had enough for everyone and it doubled nicely. The only thing I didn’t double was the spinach. I felt the one box of frozen chopped spinach I had was just enough for the dish. If I would have added another 10 oz box, it would have overpowered the dish. The kids and hubby really enjoyed it and my son had more than his fair share so I’m glad I doubled it.

Creamy Chicken and Spinach Casserole:

Serves 4

  • 1 1/2 tbs olive oil
  • 12 ounces boneless, skinless chicken breasts, trimmed and sliced thin
  • 1 onion, minced
  • 3 garlic cloves, minced
  • 1/8 tsp red pepper flakes
  • 2 tbs all-purpose flour
  • 4 cups 1% lowfat milk
  • 1 bay leaf
  • 1/2 cup grated Parmesan cheese
  • 2 tsp fresh lemon juice
  • 10 oz frozen spinach, thawed, squeezed dry and chopped coarse. (chopped spinach is also good)
  • Salt and Pepper
  • 8 oz whole-wheat penne
  • 1/2 cup shredded part-skim mozzarella cheese (about 2 oz)
  1. Adjust an oven rack to the middle position and heat the oven to 425 degrees. Lightly coat an 8 inch square baking dish with vegetable oil spray and set aside.
  2. Heat 1 1/2 tsp of the oil in a 12 inch nonstick skillet over high heat until just smoking. Add the chicken, break up any clumps, and cook until lightly browned but not fully cooked, about 3 minutes. Transfer to a bowl.
  3. Add the remaining tablespoon oil to the skillet and return medium heat. Add the onion and cook until softened, about 5 minutes. Stir in the garlic and red pepper flakes and cook until fragrant, about 30 seconds.
  4. Stir in the flour and cook for 1 minute. Slowly whisk in the milk and bay leaf and bring to a simmer. Cook, stirring occasionally, until the sauce has thickened slightly, about 10 minutes.
  5. Return the chicken with any accumulated juice to the skillet. Simmer until the chicken is cooked through, about 1 minute. Off the heat, discard the bay leaf and stir in the Parmesan and lemon juice. Stir in the spinach, breaking up any clumps, until well combined. Season with salt and pepper to taste.
  6. Meanwhile, bring 4 quarts water to a boil in a large pot. Add the pasta and 1 tbs salt and cook, stirring often, until almost al dente but still firm to the bite. Reserve 1/4 cup of the cooking water, then drain the pasta and return it to the pot.
  7. Add the chicken-spinach mixture and reserved cooking water to the pasta and toss to combine. Pour the pasta into prepared baking dish and sprinkle evenly with the mozzarella. Bake until the sauce is bubbling and the cheese is lightly browned, about 15 minutes. let cool for 5 minutes before serving.

Source: America’s Test Kitchen Healthy Family Cookbook

Basic Pizza Dough

Making pizza at home is something that a lot of people enjoy doing. It’s fun for the whole family to get involved in, especially the kids. My kids love to form the dough into the pizza shape and add whatever toppings they want. It’s really a great way to get little ones interested in cooking. Most grocery stores now have fresh dough you can buy, but they don’t compare to the dough you can make at home. I’ve made this recipe quite a few times now and it’s never let me down. The recipe says it’ll make 3 medium pizzas. Sadly, my pizza stone got broke some time back and I have yet to replace it. I have been making the pizzas in a sheet pan. If you like a very thick crust use the whole dough in one sheet pan. If you like it on the regular/thinner side, cut the dough in half. The dough also freezes very well. You’ll want to wrap it to freeze it once the first rise is done. I would recommend wrapping it saran wrap then put it into a gallon size freezer bag. The dough will expand a little till it’s frozen all the way through. When ready to use, take out of freezer and place in the refrigerator till thawed. Allow to come to room temperature (30 minutes) and it’s ready to be shaped.

One of my favorite pizzas is this white pizza. Heat olive oil in a small saute pan with 2 small cloves of garlic, chopped finely. Once the dough is ready for the toppings I use a pastry brush and spread the garlic infused olive oil all over the dough. I top it with dollops of goat cheese, mozzarella and Italian fontina cheeses. Bake at 450 degrees and it’s amazing! Serve with a spring green salad tossed with a lemon vinaigrette. 2 tbs freshly squeezed lemon juice, 4 tbs olive oil, salt and pepper to taste. Whisk together and serve.

Basic Pizza Dough:

Yields: 2-3 medium pizzas

  • 1/2 cup warm water (about 110 degrees)
  • 1 envelope (about 2 1/4 tsp) instant yeast
  • 1 1/4 cup water, at room temperature
  • 2 tbs olive oil
  • 4 cups (22 ounces) bread flour, plus more for dusting the work surface and hands
  • 1 1/2 tsp salt
  • Olive oil for oiling the bowl
  1. Measure the warm water into a 2-cup liquid measuring cup. Sprinkle in the yeast and let stand until the yeast dissolves and swells, about 5 minutes. Add the room-temperature water and 2tbs olive oil and stir to combine.
  2. Place the flour and salt in the bowl of a standing fitted with the paddle. Briefly combine the dry ingredients. Slowly add the liquid ingredients and continue to mix at low speed until a cohesive mass forms. Stop the  mixer and replace the paddle with the dough hook. Knead until the dough is smooth and elastic, about 5 minutes. Form the dough into a ball, put it in a deep oiled bowl, cover with plastic wrap. Let rise until doubled in size, 1 1/2 to 2 hours. Press the dough to deflate. The dough is now ready to be used. *Note* if you are having problems with forming the dough, let it sit to rest for about 15 minutes and try again.

To make by hand:

  1. Follow the recipe through step 1. Omit step 2 and instead combine the salt and half the flour in a deep bowl. Add the liquid ingredients and use a wooden spoon to combine. Add the remaining flour, stirring until a cohesive mass forms. Turn the dough onto a lightly floured work surface and knead until smooth and elastic, 7 to 8 minutes, using as little dusting flour as possible while kneading. Form the dough into a ball, put it in a deep oiled bowl, cover with plastic wrap. Let rise until doubled in size, 1 1/2 to 2 hours. Press the dough to deflate. The dough is now ready to be used.

Source: The New Best Recipe from Cook’s Illustrated