Peanut Butter Snicker Cookies

My husband officially started his new job a few weeks ago. I wanted him to go in on his first day with cookies. How could anyone be worried about their new boss when he comes bringing cookies? I had it all planned out, I was going to be making oreo stuffed cookies. But the day I was going to the store to get all the ingredients, this recipe appeared on my Google Reader feed. I knew right then and there this was what I’d be making for him. The recipe calls for the new Snickers Peanut Butter squares. Sadly, my store was all sold out except for 1 lonely package. I bought it and got the rest in regular snickers. They turned out great having a nice mix between the two snickers. My husband tells me they got rave reviews and I have set the bar high for myself. I look forward to baking them all sorts of things once the kids and I get over there this summer.

Peanut Butter Snicker Cookies:

*Makes about 24

  • 1 1/4 cups all-purpose flour
  • 3/4 teaspoon baking soda
  • 1/2 teaspoon baking powder
  • 1/4 teaspoon salt
  • 1/2 cup unsalted butter, softened
  • 1 cup creamy peanut butter
  • 3/4 cup granulated sugar
  • 1/2 cup light brown sugar
  • 1 egg
  • 1 tablespoon milk
  • 1 teaspoon vanilla extract
  • 1 1/2 cups chopped Snickers Peanut Butter squares or Snickers candy bars  (4 regular size bars)
  • 3/4 cup milk chocolate chips
  1. Preheat oven to 350 degrees F. Line a two baking sheets with parchment paper or silicone baking mats. Set aside.
  2. In a medium bowl, whisk together the flour, baking soda, baking powder, and salt. Set aside.
  3. In the bowl of a stand mixer, beat the butter and the peanut butter together until fluffy. Add the sugars and beat until smooth. Add the egg and mix until combined. Add the milk and the vanilla extract and mix again.
  4. Add the flour mixture and beat until flour disappears. Stir in the chopped Snickers and chocolate chips.
  5. Drop by heaping tablespoons onto the prepared baking sheets. (I weighed mine out to about 2 ounces of dough per cookie.) Gently flatten each cookie ball with the palm of your hand. Bake for 10-11 minutes, or until cookies are slightly brown on the edges.
  6. Cool the cookies on the baking sheets for about 5 to 10 minutes, then remove to a rack to cool completely. Store in an airtight container at room temperature.

Easter Lamb Cake

I want to share with you what one of my families Easter traditions are. We have several, but my favorite one is this Lamb Cake. Sadly, this year will be the first year I will not be making one. We are heading to where we will be moving soon, to be with my husband. He’s already started working and the kids and I are waiting for school to end before we are permanently there. Anyway, this picture comes from last years cake so please ignore the lack of decorations around the lamb. I have no idea why I took a picture of the cake before it was completed, but this was before I decided to start doing a blog. The one thing I would like to point out is the platter the lamb is on. This was my Great Grandmother’s and she used it to put her Lamb Cake on. One thing I wished I had of hers was the cast iron lamb mold. I have a very flimsy one, which desperately needs replaced. If you want to make a Lamb cake I highly recommend a good mold, so the cake batter doesn’t flow out the sides (like mine).

Let’s talk about the cake… It’s basically a spice cake and in order for the cake to stand up it has to be firm and dense. The cake has an ingredient in it called ground mace. The only time I ever use ground mace is when I make this cake. I honestly think this is what makes this cake taste wonderful. Whenever I smell the ground mace, it reminds me of my childhood. I can’t tell you how long this recipe has been in my family, but I know that at least my Great Grandmother used it. You don’t have to make this in a lamb cake mold. It would be great as a layered cake too. The recipe makes 2 lamb cakes. If you wanted to make it as a layered cake I would use 2 or 3 9 inch round cake pans. I’ve never made it as a round cake before so I’m unsure exactly how  many pans you would need. But, the cakes really puff up so I am thinking 3 might be good.

Either way you make this, I am just so thrilled to share my family recipe with you. I really hope you make this and enjoy it with your family. Happy Easter!

Lamb Cake Spice Cake:

makes 2 lamb cakes or 2-3 9inch round cakes

  • 4 1/2 cups Sifted Cake Flour
  • 1/2 tsp salt
  • 1/2 tsp ground mace (optional, although I recommend it)
  • 1 lb unsalted butter, softened
  • 2 1/3 cup granulated sugar
  • 7 eggs
  • 1/2 tsp almond flavoring
  • 1/2 tsp vanilla
  1. Prepare cake pans, butter and flour (use the cake flour) the insides of the pans you will be using. Shake out the excess flour.
  2. Preheat oven to 350 degrees.
  3. In a large bowl, or over parchment paper, sift flour once, measure and re-sift with the salt and mace. Set aside.
  4. In another bowl, cream the butter till waxy, then add the sugar gradually and cream together till mixture is light and fluffy. Add the eggs, one at a time, beating well and scraping after each addition, till smooth. Add vanilla, almond extracts and blend.
  5. Gradually add the flour mixture beating and scraping after each addition till well blended. If using round cake pans, pour batter evenly into each prepared pan. Bake for 40-45 minutes, or until a cake tester comes out clean.
  6. *If using Lamb mold* Place the mold, nose side down on baking sheet and fill the batter so it is rounded on top. Cover with the other half of the mold and bake for 1 1/2 hours, but start checking the cake after 45 minutes. You should be able to start testing the cake at this time with a cake tester, it will be done when it comes out clean.
  7. Let cool on rack for at least 30 minutes, before you unmold it to cool down completely. Frost as desired.
Icing:
*enough to ice 1 cake
  • 2 sticks softened butter
  • 1lb confectioners sugar
  • 1 tsp vanilla
  • 4-8 tbs water
  1. Mix together the butter, sugar and vanilla. Start with 4 tbs water, if the consistency is too thick, add another tbs. (You don’t want it too thin, I’ve used no more than 5tbs of water) Beat the frosting for at least 7 minutes on high. You want the frosting to be rich and fluffy.
  2. Ice your cake and enjoy!
Source: Gina Marie’s Family

Strawberry Pretzel “Salad” Dessert

I had never tried this kind of dessert before but apparently it’s very popular among the potluck world. I have been to many potluck dinners but somehow missed this dessert. The salty pretzels and the sweet cream cheese mixture and jello really go well together. My brother-in-law said he’s had this with raspberries and I think it would be awesome with frozen raspberries and raspberry jello. I plan to make it with raspberries next time I make this. Either way, it’s a nice refreshing dessert that would go great with your spring gatherings.

Strawberry Pretzel “Salad” Dessert:

Crust:

  • 2 cups crushed pretzels (Do not put in processor)
  • 3/4 cup melted butter
  • 3 tablespoons sugar

Filling:

  • 1 (8-ounce) package cream cheese
  • 3/4 cup sugar
  • 1 (8-ounce) container whipped topping

Topping:

  • 2 (3-ounce) packages strawberry gelatin dessert mix
  • 2 cups boiling water
  • 2 (10-ounce) packages frozen strawberries
  • 1 (8-ounce) can crushed pineapple
  • Whipped topping or whipped cream, to garnish
  1. Preheat oven to 400 degrees F.
  2. For the Crust: Grab a medium bowl, add the pretzels, butter and 3 tablespoons of sugar, and mix them together. Press this mixture into a 9 by 13-inch pan. Bake for 7 minutes. Set aside to cool.
  3. For the Filling: In a mixing bowl, beat together the cream cheese and 3/4 cup of sugar. Fold in the whipped topping, and spread over the cooled crust. Refrigerate for at least 2 hours, until well chilled.
  4. For the Topping: In a small bowl, dissolve the gelatin in boiling water, and allow to cool slightly. Add the strawberries and pineapple, and pour over the cream cheese mixture. Refrigerate until serving time.
  5. Serve slices with a dollop of whipped topping.

Source: Ezra Pound Cake via Paula Deen Food Network

Cupcake Tower with Ganache Filled Cupcakes

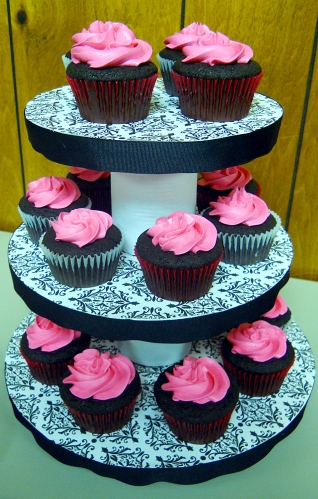
For the bridal shower I hosted a few weeks ago, I knew what kind of cupcakes I was going to make. But how was I going to display them? Then I remembered I had seen a tutorial on how to make your own cupcake tower on Annie’s Eats blog. The nice thing about making your own cupcake tower is that you are able to make it fit whatever theme your party is. I am looking forward to football season so I can make a Penn State cupcake tower.

If you want to make this, Annie has a terrific tutorial on her blog and you can find that here. The one thing I did differently was instead of using a round foam disc, my father-in-law made me a round wooden disc. I felt that would going to give it more stability, but I’m sure using the foam disc will work out just fine. I like the wooden bottom because I can reuse it for other cupcake towers.

For the cupcakes I made Dark Chocolate Cupcakes with Buttercream Frosting and I hollowed out the center and filled it with ganache. To put ganache in the middle of a cupcake is easy. Take a sharp knife and cut a little hole in the top-middle of the cupcake. Take it out, but be careful to leave the top so you can put it back on the cupcake once you are done with the filling. Once you have your hole fill it with desired filling and place the “lid” back on and frost as usual.

Ganache:

  • 1/2 cup heavy cream
  • 8 ounces good semisweet chocolate chips
  • 1 teaspoon instant coffee granules
  1. Cook the heavy cream, chocolate chips, and instant coffee in the top of a double boiler over simmering water until smooth and warm, stirring occasionally.
  2. Let sit in refrigerator for about 30 minutes. Take melon baller or spoon ganache in the middle of the cupcakes.

Source: Ina Garten via Food Network


Butterscotch Chip Cookies

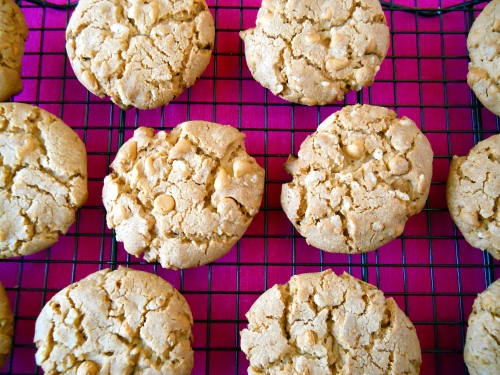
I made these cookies for one of my very best friends. She lives in Omaha and has been a smoker for a very long time. She decided it was time to quit and for several months she has been smoke free. I’m extremely proud of Kiki and asked her what kind of cookies she is craving. She gave me a list of cookies but the one that topped her list was Butterscotch Chip.

So, I began my search for the best recipe I could find. I’ve never made them before so it was kinda new territory for me. But I figured it wouldn’t be much different than chocolate chips cookies. I didn’t want to substitute butterscotch chips in a regular chocolate chip cookie, I wanted the butterscotch flavor to come through. One of the other things Kiki mentioned was a cookie from an old family recipe, she remembered it had rice cereal, coconut and whole bunch of other things. As I was searching I found a recipe that included butterscotch instant pudding and rice cereal, score! It did call for chocolate chips, but this time substituting them for butterscotch would work since there is butterscotch pudding to help enhance that flavor. As I was making the cookies, I realized that the brown sugar I had was as hard as a brick, but I did have Splenda brown sugar. Thankfully that worked out really nice and I ended up with a low sugar cookie that tastes amazing!

Kiki says the cookies tasted great and that they shipped well.

Butterscotch Chip Cookies:

  • 1 1/2 c flour
  • 1 c whole wheat flour
  • 1 tsp baking powder
  • 1 tsp baking soda
  • 1/2 tsp salt
  • 3/4 c  sugar
  • 1 1/4 c brown sugar or 1/2 cup plus 2 tbs Splenda brown sugar
  • 2 eggs, room temp
  • 2 tsp vanilla
  • 1 Tbsp milk
  • 1 tsp nutmeg
  • 1 c butter flavored shortening
  • 1 pkg butterscotch-flavored sugar free instant pudding mix
  • 2 Tbsp honey
  • 1 1/2 c rice cereal
  • 1 1/2 – 2 c butterscotch chips
  1. Preheat the oven to 350F and line two baking sheets with parchment paper.
  2. In a large bowl, mix together the flours, baking soda, baking powder and salt. Set aside.
  3. In a small bowl, combine the sugars using a fork to break up any lumps in the brown sugar. Set aside.
  4. In yet another small bowl, beat the eggs, vanilla, milk and nutmeg, on high until light and fluffy.
  5. In the bowl of a stand mixer fitted with paddle attachment, beat the shortening until it’s fluffy. Add half of the sugar and beat until incorporated, then add the second half. Beat on high until grainy, about 3 minutes. Add in the pudding mix and beat until combined.
  6. Pour in half of the egg mixture and beat until incorporated. Repeat with the second half, being sure to scrape the bowl. Drizzle in the honey and beat until fluffy.
  7. Add 1/3 of the dry ingredients and mix on low speed until just incorporated. Scrape the sides of the bowl and repeat, adding the rest of the dry ingredients in two portions. Gently fold in the oats and chocolate chips.
  8. Portion dough into approximately 1/4 c balls (or use a 1 3/4 oz disher) and place on baking sheets about 2 inches apart. Bake for 15-17 minutes, until the edges just begin to brown. Transfer sheets to cooling racks and allow cookies to cool on the sheets for about 5 minutes before transferring to cooling racks.

Source: Slightly adapted from Whisk-Kid

Dark Chocolate Cupcakes with Buttercream Frosting

This winter we were so busy with my daughters cheerleading activities. She was cheering for basketball, wrestling and competing. Competition cheerleading is still going on but basketball and wrestling has wrapped up for the season. The cheerleaders had an end of the year party and I volunteered to make cupcakes for them. I wanted to incorporate their school colors, black, red and white. I figured the perfect way to do that is to make chocolate cupcakes and make the icing red and white. They turned out exactly how I pictured them and they tasted even better!

I’m proud of my cheerleader and all the hard work she’s done. I feel so blessed that my daughter is surrounded by such a great group of girls. They have all done such a fantastic job this year and deserved a decadent treat like these cupcakes.

Dark Chocolate Cupcakes:

Makes 24 cupcakes*

*I doubled this recipe with no problem

  • 16 tbs (2 sticks) unsalted butter, cut into 16 pieces
  • 4 oz bittersweet chocolate, chopped
  • 1 cup Dutch-processed cocoa powder
  • 1 1/2 cups all-purpose flour
  • 1 1/2 tsp baking powder
  • 1 tsp baking soda
  • 1 tsp salt
  • 4 large eggs, at room temperature
  • 2 tsp vanilla extract
  • 1 1/2 cups sugar
  • 1 cup sour cream
  1. Microwave the butter, chocolate, and cocoa together, whisking often, until melted and smooth, 1 to 3 minutes. Set aside to cool until just warm to the touch.
  2. Meanwhile, adjust an oven rack to the middle position and heat the oven to 350 degrees. Line two muffin pans with cupcake liners. Whisk the flour, baking powder, baking soda, and salt together in a large bowl and set aside.
  3. Whisk the eggs and vanilla together in a large bowl. Slowly whisk in the sugar until combined. Whisk in the cooled chocolate mixture.
  4. Sift one-third of the flour mixture over the batter, then whisk it in. Whisk in the sour cream. Sift the remaining flour mixture over the batter and whisk until completely incorporated. (the batter will be thick).
  5. Fill the cupcake liners about two-thirds full. Bake until a wooden skewer inserted into the center of a cupcake comes out with a few crumbs attached, 18-22 minutes, rotating the pans halfway through baking.
  6. Let the cupcakes cool in the pans on wire racks for 5 minutes. Remove from the pans and let cool completely on the racks before frosting, about 1 hour.

Quick and Rich Vanilla Frosting:

Makes enough to cover 24 cupcakes

  • 2 tbs heavy cream
  • 1 tsp vanilla extract
  • Pinch Salt
  • 2 1/2 sticks unsalted butter, softened
  • 2 1/2 cups confectioner sugar

Stir the cream, vanilla and salt together in a small bowl until the salt dissolves. Beat the butter with an electric mixer on medium-high speed until smooth, 30-60 seconds. Reduce the speed to medium-low, slowly add the confectioners sugar, and beat until smooth, 2 to 5 minutes. Beat in the cream mixture. Increase the speed to medium-high and beat until the mixture is light and fluffy, 4-8 minutes.

Source: America’s Test Kitchen Family Cookbook

Onesie Sugar Cookies

I had been planning on making these onesie sugar cookies as soon as my sister-in-law said she was pregnant. I knew they would make the perfect party favor for everyone to take home from the shower. Making decorative sugar cookies takes time and devotion. You just can’t roll, cut, bake and decorate in one day. It takes a lot planning ahead of time. I had never made 55 cookies at one time before so I was unsure how much time I needed. I spent roughly 9 hours working on the cookies. That is from beginning to end. Knowing this, I’ll be able to plan even better for the next time I have to make so many.

One of my biggest set backs while making the cookies was the first batch I was trying to roll out. The darn cookies wouldn’t come together. They kept crumbling even though I kneaded and kneaded them like crazy. I went back to review the recipe and found I did a few things wrong. First, I didn’t cream the butter and sugar long enough. As I was kneading the cookies I could feel a lot of grit on my fingers, that tells me the creaming wasn’t done properly. Second, the original recipe calls for at least 1 tsp of vanilla and I was using half that. Once I creamed the butter and sugar better and added more vanilla, the rest of the batches worked out great.

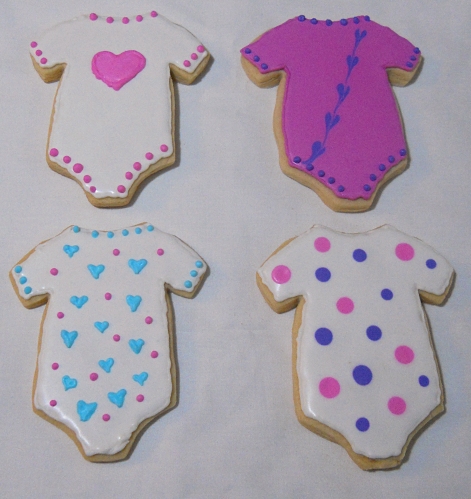
The most fun I had was trying to figure out patterns and designs for the cookies. I wanted them all to be different and unique in their own way.

Polka dots are so much fun. I work with 6 cookies at a time. After all the cookies are outlined with the stiffer icing, it’s time to flood. Thinned out royal icing is what you use to “flood” the cookies. Once you have 6 cookies flooded, go back to the first one; take another color of thinned icing and put one drop of that on the already wet cookie. The drop will blend into the icing. Continue to do that till you have it like you want.

Accidents happen and when they do you just go with the flow. That’s what I did with the cookie in the upper right. My original plan was a polka dot cookie, but the last drop I did had a tail on it. There was no way I could leave it that way. I took a toothpick and connected all the dots by dragging the toothpick to each dot. I used the same method to make the hearts. I dropped 5 drops of pink thinned icing on the white cookie and dragged a toothpick down to create those hearts you see on the cookie in the lower left corner.

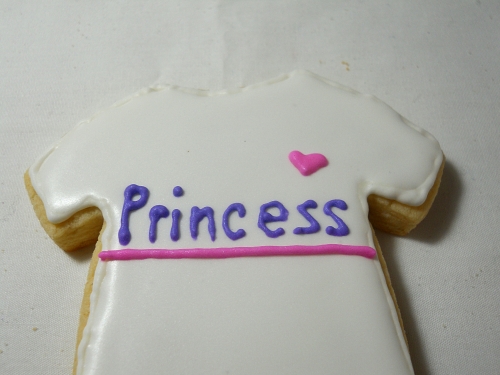
I’m still working on the writing part. Not quite happy with how some of the ones I wrote on turned out. But as I tell my kids, practice makes perfect.

Sugar Cookies:

  • 3 c unbleached, all-purpose flour
  • 2 tsp baking powder
  • 1 c sugar
  • 2 sticks cold butter, cut into cubes
  • 1 egg
  • 1 tsp pure vanilla extract
  • 1/2 tsp pure almond extract
  1. Preheat oven to 350.
  2. Combine the flour and baking powder, set aside. Cream the sugar and butter. Add the egg and extracts and mix. Gradually add the flour mixture and beat just until combined, scraping down the bowl, especially the bottom.
  3. Roll onto a floured surface and cut into shapes. Place on parchment lined baking sheets and bake for 10-12 minutes. Let sit a few minutes on the sheet, then transfer to a cooling rack.


Royal Icing:

  • 4 TBSP meringue powder
  • scant 1/2 c. water
  • 1 lb. powdered sugar
  • 1/2 tsp light corn syrup
  • few drops clear extract (I use almond extract)
  1. Combine the meringue powder and water. With the paddle attachment of an electric mixer, beat until combined and foamy.
  2. Sift in the powdered sugar and beat on low to combine. (Do NOT skip the sifting!)
  3. Add in the corn syrup and extract.
  4. Increase speed to med-high/high and beat for about 5 minutes, just until the icing is glossy and stiff peaks form.
  5. Cover with plastic wrap touching the icing or divide and color using gel paste food colorings.

Source: Cookies Bake at 350 Royal Icing and Techniques Bake at 350